
The first bowls I made involved balloons, air-dry clay and a far more complicated, lengthy and messy process than necessary.
Then I saw Katie Gordon’s video (link below) where a glass bowl is used as the form, and that changed everything.
The basic idea is take a glass globe and use it to make your bowl in 2 pieces. First make the bottom half, cure it, remove it from the glass (more on that later) and then make the top half. Once both pieces are cured and removed from the glass you can “seam” them together and then cover it however you wish.
A couple ways in which I deviated from Katie’s process is that I made a lid and I used the middle of the bowl for both halves. This produced a more rounded version.
I did sand and buff the outside of these bowls which makes for a glass like finish that is very smooth and beautiful.

It is both good news and bad news that polymer clay sticks very nicely to glass – depending on what you are making. In this case, it’s not super good news because getting the clay off glass can be tricky. Once you are able to loosen it’s grip, the clay pops nicely off but it’s very easy to break the clay instead, especially if you’re impatient and haven’t let it thoroughly cool first.
One trick I learned is to gently insert a very flexible blade between the clay and the glass and slow work it from side to side. Unfortunately this technique will scratch the glass-like surface of your clay but I planned to cover the inside with more clay anyway so this was not an issue for me.


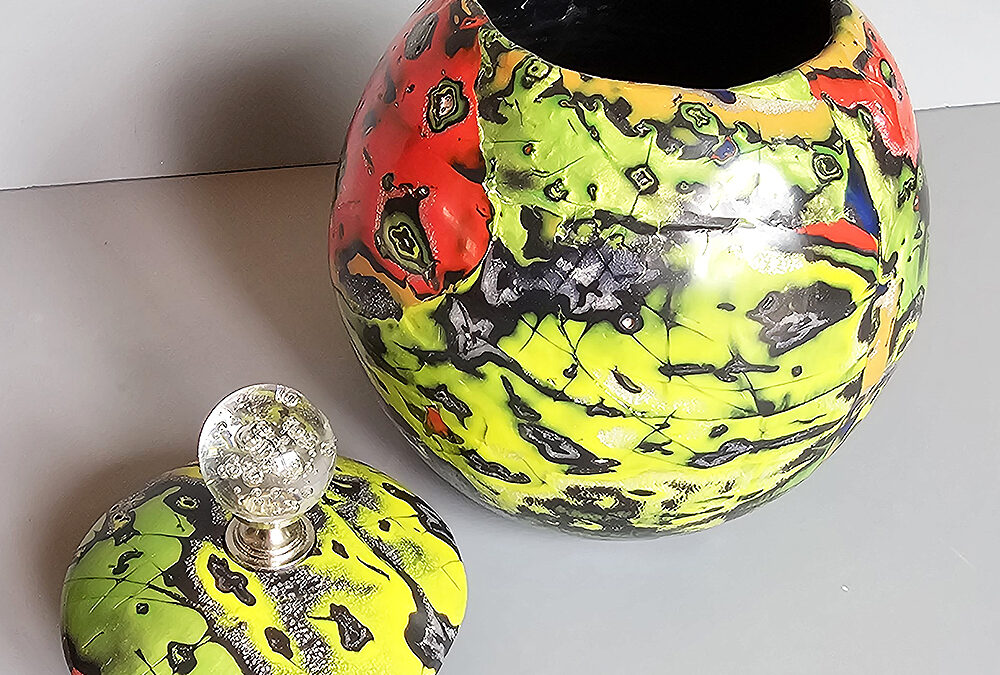
The finished (not yet sanded) vase.
In thinking more about the problem of loosening the clay from the glass, I came up with the idea of putting a thin piece of wire (I used 26 gauge in this example) between the glass and clay prior to curing it.
The bottom half of this glass globe (bottom photo on the right) is covered with silver clay so it’s more difficult to see, but you can tell how the wire is placed. This view is looking down on the inside of the globe.
Once cured (and completely cooled) I was able to work the wire around in a complete circle, very easily breaking the seal between the glass and the clay!
This was a lot faster, greatly reduces the chances of breaking the clay, and it resolved the problem of blade scratches, but it did leave a groove on the inside where the wire was. This is easily filled in with additional clay after removal, but if your aim was to have the glassy interior, this would not be a good solution.

You can choose anywhere on the glass globe to meet the two halves, but the trick is using a marker or tape or some other way to mark the exact line where both halves of your bowl come to. This is very important because the the bottom of your top half and the top of your bottom half must meet at the same place, otherwise they will have a different circumference and will not fit together.
This technique works great if you want a rounded globe/bowl, but what if you want something in a more complicated shape? It occurred to me that if you can make a top half and a bottom half and put them together, why can’t you put 2 side halves together? I decided to try with this with a glass vase. I started by covering the entire vase with a sheet of black (rolled to about the 3rd thickness on my pasta machine).
Once cured, I used a sharp blade and cut right down the middle.

Here are both sides after being removed from the glass vase. When polymer clay is baked on glass, it takes on the glassy appearance, which is why the insides of these 2 pieces are so shiny.
I painted the edges on both sides with liquid polymer clay and reunited them using a strip of black clay. An advantage to this method is that both sides will magically match up even if you did not cut them in a perfectly straight line.
I used black here so you could clearly see the seam.
Once it’s cured again you will have a solid piece that you can cover with any veneer you wish. One thing I would do differently is cover the inside of both pieces before joining them (much simpler than trying to do it after).

